C++调用tensorflow训练好的SSD物体检测模型-opencv3.4.3
本博文参考:https://blog.csdn.net/guyuealian/article/details/80570120
介绍
opencv真的是一个很强大的库,当深度学习开始逐渐成熟后,opencv也迅速把相对应的模块加入到其开源库中,现在opencv已经可以支持tensorflow、caffe和torch三种框架训练出来的模型。本篇博文主要介绍opencv调用训练好的tensorflow .pb模型。
电脑配置
GTX1060
I7-8700k
SSD
模型
主要测试两种模型,“ssd_mobilenet_v1_coco_11_06_2017”和“ssd_inception_v2_coco_2017_11_17”。下载地址:
ssd_mobilenet_v1_coco_11_06_2017
ssd_inception_v2_coco_2017_11_17
当然了,你可以自己训练模型,也可以下载更多的预训练模型,这个可以到TensoFlow下载,下载地址是:
https://github.com/tensorflow/models/blob/master/research/object_detection/g3doc/detection_model_zoo.md

Tensorflow模型的graph结构可以保存为.pb文件或者.pbtxt文件,或者.meta文件,其中只有.pbtxt文件是可读的。在OpenCV中,每个模型.pb文件,原则上应有一个对应的文本图形定义的.pbtxt文件,当然也可能没有,在opencv_extra\testdata\dnn有些.pbtxt文件是可以对应找到,这个要看opencv会不会提供,当然,这个.pbtxt是可以通过.pb文件生成的,关于如何生成的教程请见.pb到.pbtxt。这就允许我们可以把自己训练的模型通过opencv进行调用。
opencv_extra提供了一些已经做好的.pbtxt文件,下载链接请见opencv_extra。
打开下载好的opencv_extra文件夹,在“opencv_extra-master\testdata\dnn”文件夹下面包含.pbtxt文件。
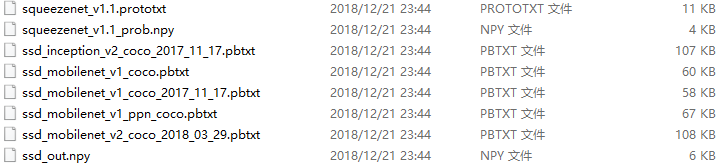
其中:ssd_mobilenet_v1_coco.pbtxt对应ssd_mobilenet_v1_coco_11_06_2017.pb; ssd_inception_v2_coco_2017_11_17.pbtxt对应ssd_inception_v2_coco_2017_11_17.pb文件。
ok,等这些文件下载好了,配置好opencv就行了~~~
源代码
基于摄像头的实时检测代码
#include<opencv2\opencv.hpp>
#include<opencv2\dnn.hpp>
#include <iostream>
#include<map>
#include<string>
#include<time.h>using namespace std;
using namespace cv;const size_t inWidth = 300;
const size_t inHeight = 300;
const float WHRatio = inWidth / (float)inHeight;
const char* classNames[]= {"background", "person", "bicycle", "car", "motorcycle", "airplane", "bus", "train", "truck", "boat", "traffic light",
"fire hydrant", "background", "stop sign", "parking meter", "bench", "bird", "cat", "dog", "horse", "sheep", "cow", "elephant", "bear", "zebra", "giraffe", "background", "backpack",
"umbrella", "background", "background", "handbag", "tie", "suitcase", "frisbee","skis", "snowboard", "sports ball", "kite", "baseball bat","baseball glove", "skateboard", "surfboard", "tennis racket",
"bottle", "background", "wine glass", "cup", "fork", "knife", "spoon","bowl", "banana",  "apple", "sandwich", "orange","broccoli", "carrot", "hot dog",  "pizza", "donut",
"cake", "chair", "couch", "potted plant", "bed", "background", "dining table", "background", "background", "toilet", "background","tv", "laptop", "mouse", "remote", "keyboard",
"cell phone", "microwave", "oven", "toaster", "sink", "refrigerator", "background","book", "clock", "vase", "scissors","teddy bear", "hair drier", "toothbrush"};int main()
{clock_t start, finish;double totaltime;Mat frame;VideoCapture capture;capture.open(2);String weights = "C:/Users/18301/Desktop/ssd_mobilenet_v1_coco_11_06_2017/frozen_inference_graph.pb";String prototxt = "F:/opencv/opencv_extra-master/testdata/dnn/ssd_mobilenet_v1_coco.pbtxt";dnn::Net net = cv::dnn::readNetFromTensorflow(weights, prototxt);while (capture.read(frame)){start = clock();Size frame_size = frame.size();Size cropSize;if (frame_size.width / (float)frame_size.height > WHRatio){cropSize = Size(static_cast<int>(frame_size.height * WHRatio),frame_size.height);}else{cropSize = Size(frame_size.width,static_cast<int>(frame_size.width / WHRatio));}Rect crop(Point((frame_size.width - cropSize.width) / 2,(frame_size.height - cropSize.height) / 2),cropSize);cv::Mat blob = cv::dnn::blobFromImage(frame, 1. / 255, Size(300, 300));//cout << "blob size: " << blob.size << endl;net.setInput(blob);Mat output = net.forward();//cout << "output size: " << output.size << endl;Mat detectionMat(output.size[2], output.size[3], CV_32F, output.ptr<float>());frame = frame(crop);float confidenceThreshold = 0.50;for (int i = 0; i < detectionMat.rows; i++){float confidence = detectionMat.at<float>(i, 2);if (confidence > confidenceThreshold){size_t objectClass = (size_t)(detectionMat.at<float>(i, 1));int xLeftBottom = static_cast<int>(detectionMat.at<float>(i, 3) * frame.cols);int yLeftBottom = static_cast<int>(detectionMat.at<float>(i, 4) * frame.rows);int xRightTop = static_cast<int>(detectionMat.at<float>(i, 5) * frame.cols);int yRightTop = static_cast<int>(detectionMat.at<float>(i, 6) * frame.rows);ostringstream ss;ss << confidence;String conf(ss.str());Rect object((int)xLeftBottom, (int)yLeftBottom,(int)(xRightTop - xLeftBottom),(int)(yRightTop - yLeftBottom));rectangle(frame, object, Scalar(0, 255, 0), 2);//cout << "objectClass:" << objectClass << endl;String label = String(classNames[objectClass]) + ": " + conf;//cout << "label"<<label << endl;int baseLine = 0;Size labelSize = getTextSize(label, FONT_HERSHEY_SIMPLEX, 0.5, 1, &baseLine);rectangle(frame, Rect(Point(xLeftBottom, yLeftBottom - labelSize.height),Size(labelSize.width, labelSize.height + baseLine)),Scalar(0, 255, 0), CV_FILLED);putText(frame, label, Point(xLeftBottom, yLeftBottom),FONT_HERSHEY_SIMPLEX, 0.5, Scalar(0, 0, 0));}}finish = clock();totaltime = finish - start;cout << "识别该帧图像所用的时间为:" << totaltime <<"ms"<< endl;namedWindow("result", 0);imshow("result", frame);char c = waitKey(5);if (c == 27){ // ESC退出break;}}capture.release();waitKey(0);return 0;
}
注意:这里的coco_names的id其实是到90,而不是80(coco数据集种类有80种),id不是连续的,在这里为了适应训练的模型,把空的不连续的位置都填上"background",最终id达到90。
实验结果


这个模型速度还是很快的,基本上每帧的检测时间在40~50ms左右。

测试单幅图像

